Hello World Lightning Web コンポーネントの作成
Lightning Web コンポーネントを作成する
新しいコンポーネントの名前として helloWorld と入力します。
helloWorld.html
<template>
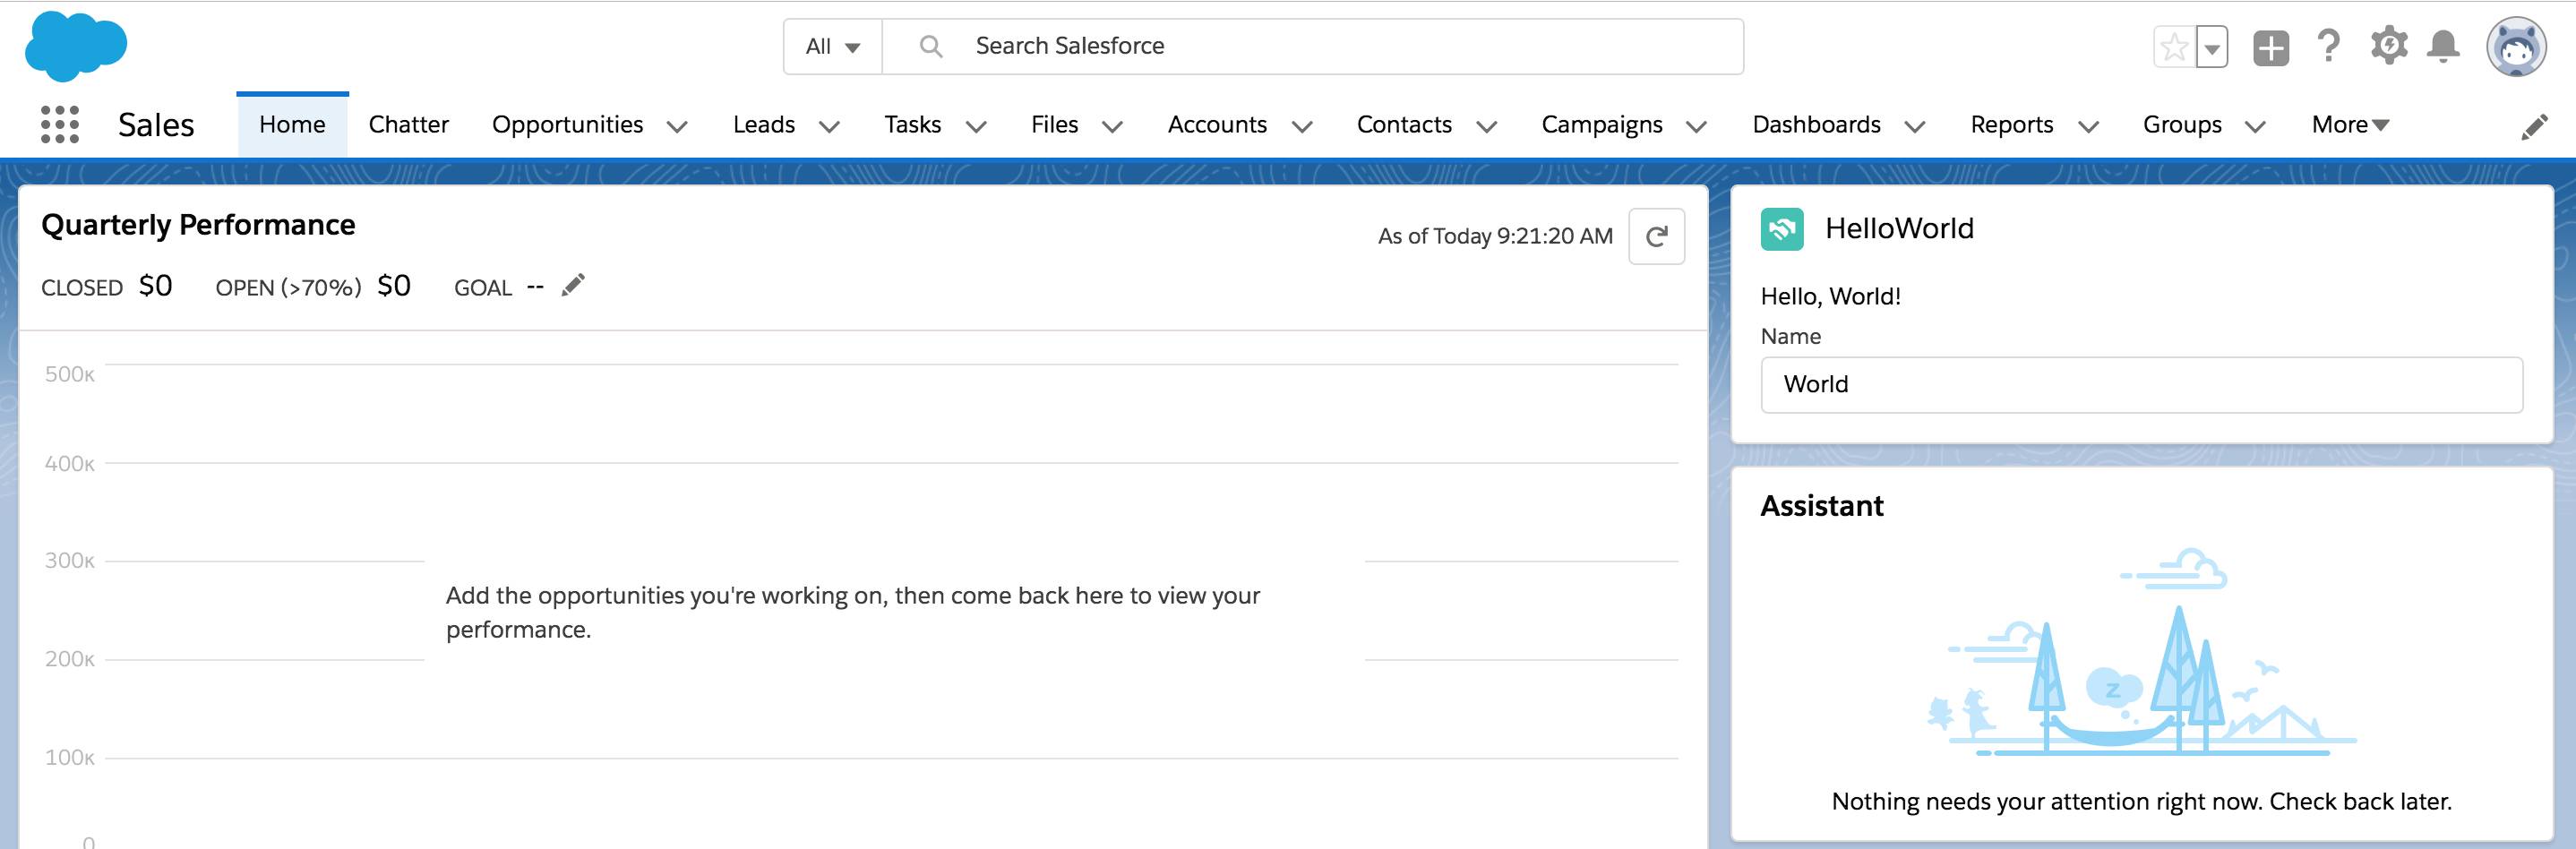
<lightning-card title="HelloWorld" icon-name="custom:custom14">
<div class="slds-m-around_medium">
<p>Hello, {greeting}!</p>
<lightning-input label="Name" value={greeting} onchange={changeHandler}></lightning-input>
</div>
</lightning-card>
</template>helloWorld.js
import { LightningElement } from 'lwc';

export default class HelloWorld extends LightningElement {
    greeting = 'World';
    changeHandler(event) {
      this.greeting = event.target.value;
    }
}
helloWorld.js-meta.xml
<?xml version="1.0" encoding="UTF-8"?>
<LightningComponentBundle xmlns="http://soap.sforce.com/2006/04/metadata">
    <apiVersion>57.0</apiVersion>
    <isExposed>true</isExposed>
    <targets>
        <target>lightning__AppPage</target>
        <target>lightning__RecordPage</target>
        <target>lightning__HomePage</target>
    </targets>
</LightningComponentBundle>
Lightning Experience でアプリケーションにコンポーネントを追加する
- アプリケーションランチャー (
 ) で、[Sales (セールス)] を見つけて選択します。
  をクリックして、[Edit Page (編集ページ)] を選択します。
- Lightning コンポーネントのリストの [Custom (カスタム)] 領域から
helloWorldLightning Web コンポーネントをページキャンバスの上部にドラッグします。
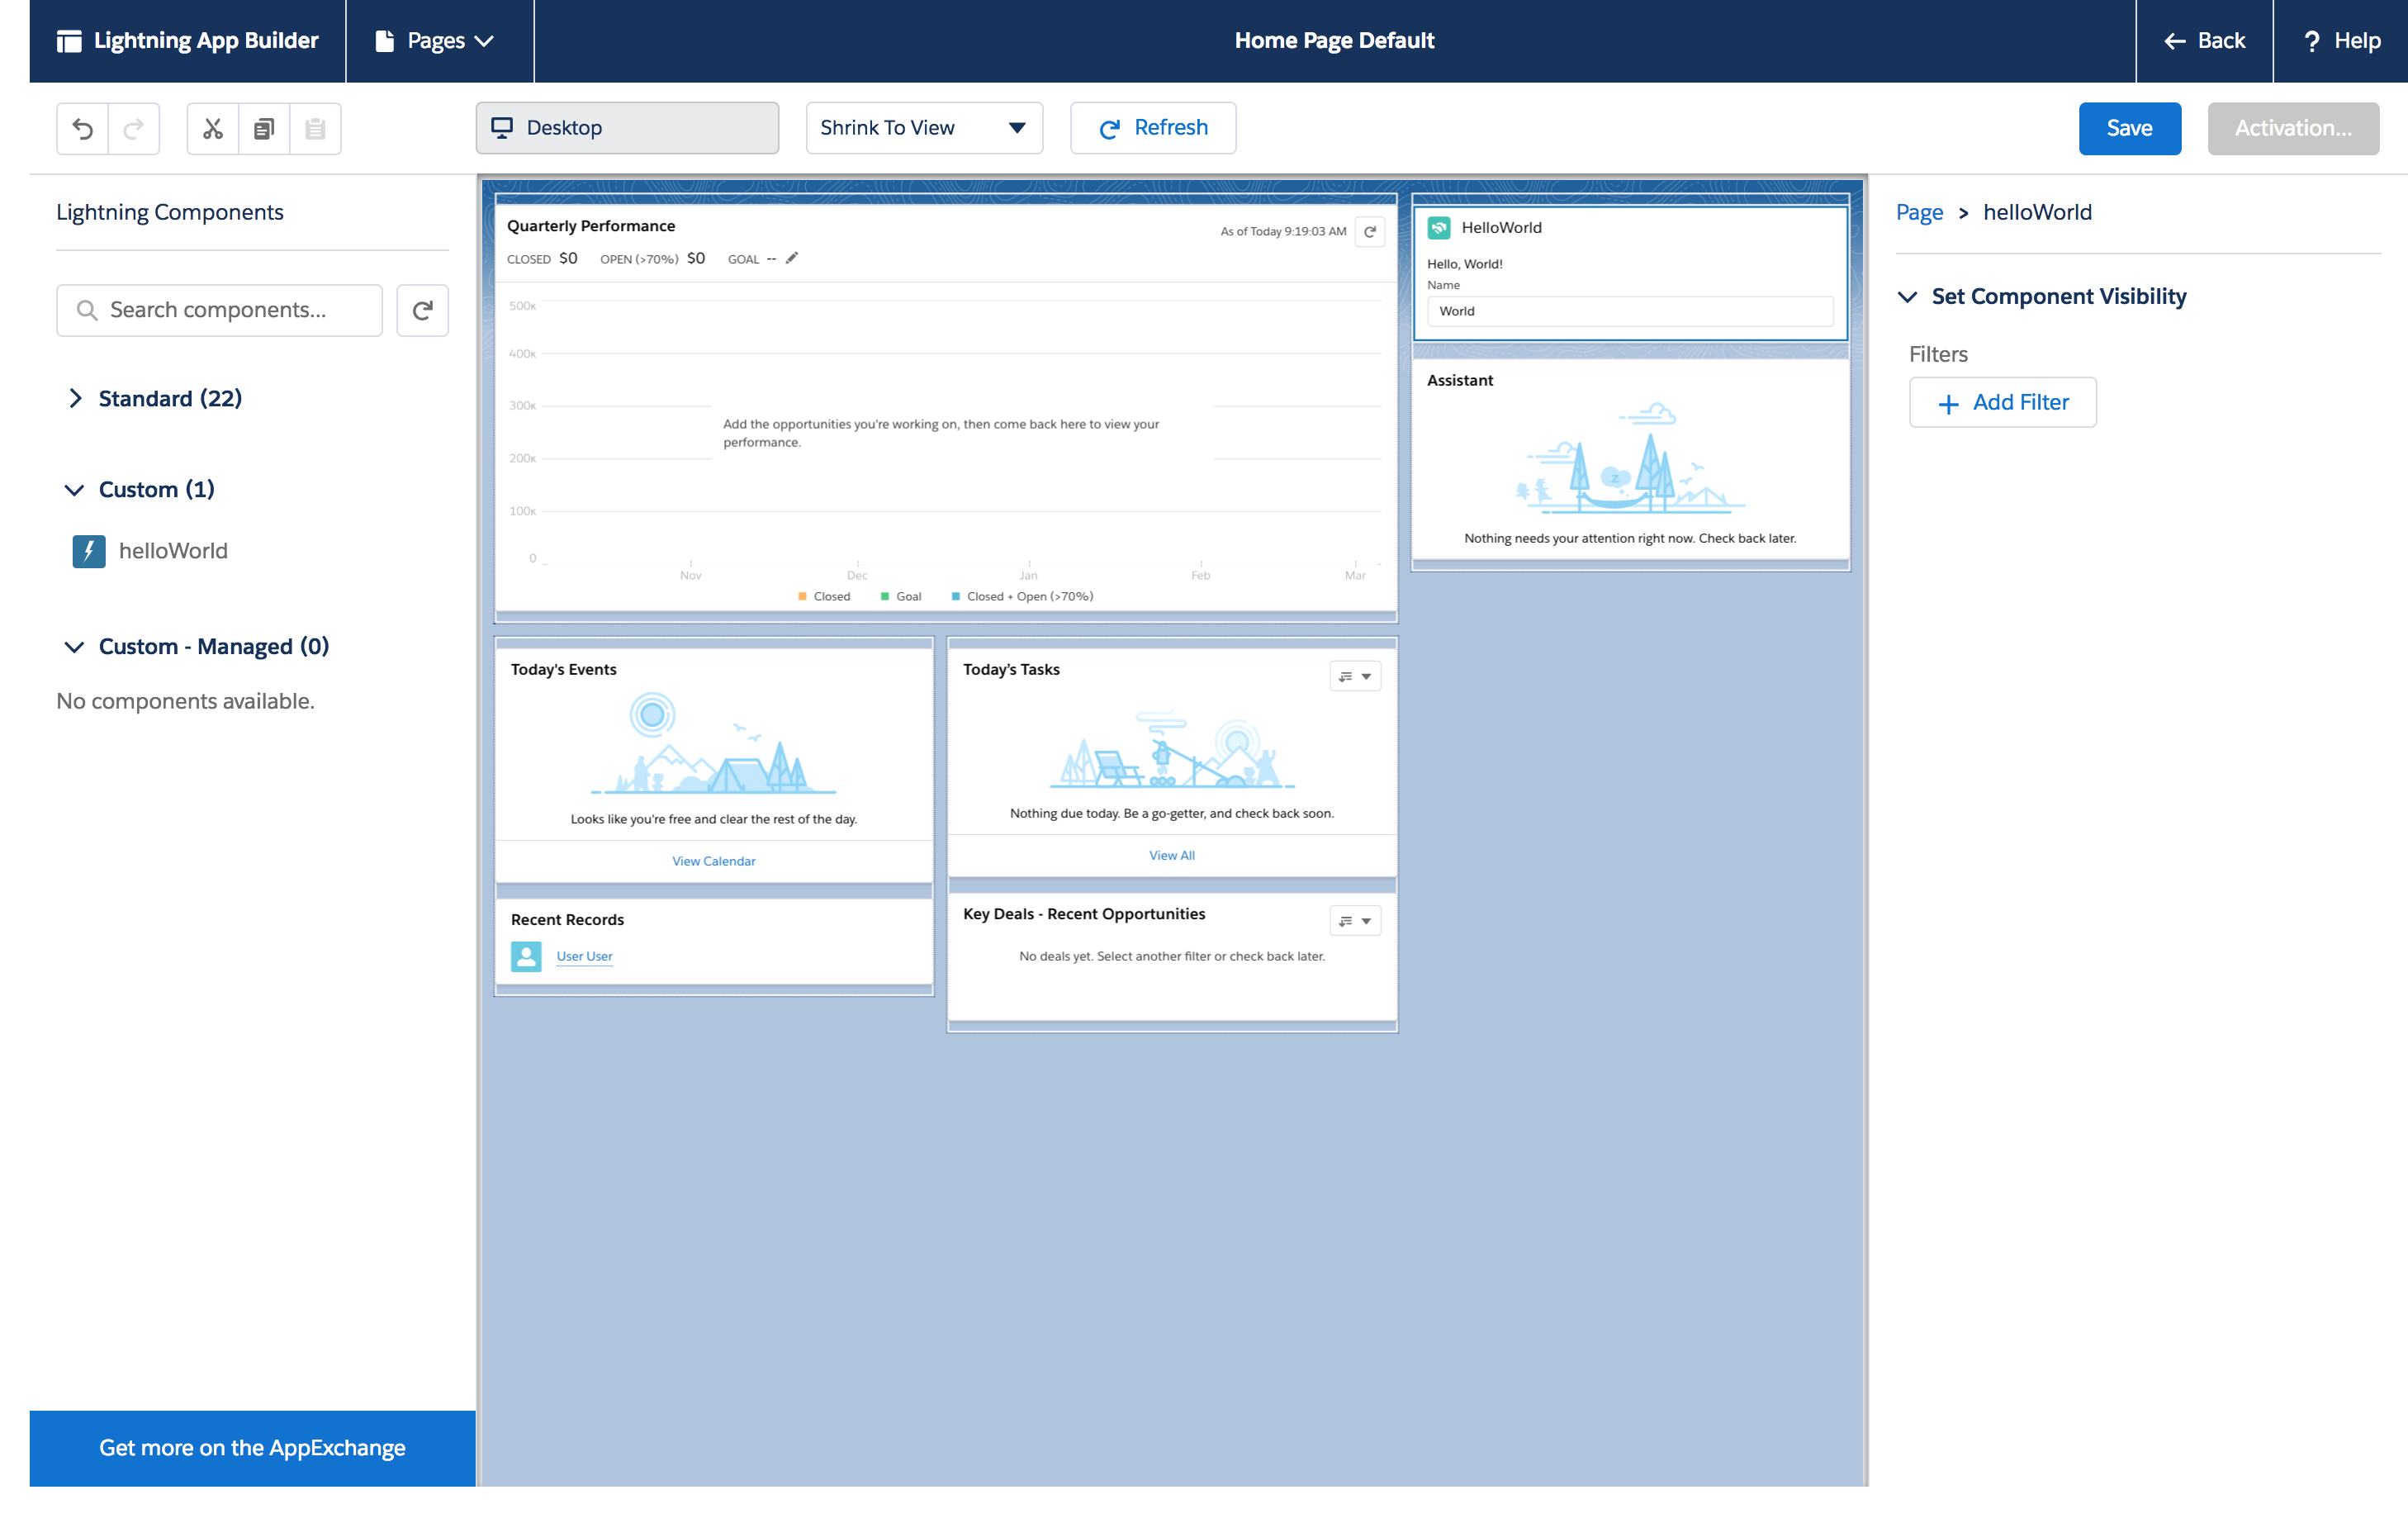
- [Save (保存)] をクリックします。
- [Activate (有効化)] をクリックします。
- [Assign as Org Default (組織のデフォルトとして割り当て)] をクリックします。
- [Save (保存)] をクリックします。
- もう一度 [Save (保存)] をクリックしてから、
 をクリックしページに戻ります。
 - ページを更新すると、新しいコンポーネントが表示されます。